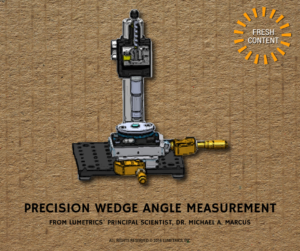
 A customer approached Lumetrics with a need to determine and certify the precision wedge angle measurement of low angle wedges in the range of 0.5 - 3.5° with a high degree of accuracy. A custom fixture was designed and constructed which included x, y, z and rotation stages with micrometer precision position feedback as shown in the diagram.
The procedure developed for measuring the Wedge Angle is a three-step process including: (1) Measuring the index of refraction of the wedge using the Lumetrics Refractive Index Calculation System (RICS). (2) Placing the wedge in the wedge measurement fixture, finding the approximate center of the wedge and then determining the wedge axis by rotating the wedge axis so that the measured thickness variation along the direction of the y axis is minimized. (3) Move back to the approximate center of the wedge and measure the optical thickness at 2 defined locations near the edges of the wedge at opposite ends of the x axis a known distance apart. The software then calculates the thickness of the wedge at each of the defined locations and the wedge angle. This measurement procedure and fixture meet the customers needs for wedge angle certification
Please email sales@lumetrics.com for more information if you have a similar measurement need or have questions! Lumetrics has expanded the solutions offered to service a broad variety of glass thickness measurement and dimensional measurement needs. For more information on our glass measurement capabilities, view our glass thickness measurement page or call us at (585) 214-2455 or (866) 524-2455
COMMENTS